
DIY: A Streaming Camera System with Licence Plate Recognition for Under €200
Commercial dashcams typically cost €50–150 and offer one thing: local recording to an SD card. If you want cloud streaming, you pay monthly fees. If you want licence plate recognition, the price climbs into the hundreds — and your data still ends up on someone else's server, the system is closed, and you cannot expand it.
In this article, we build something better: a modular camera system that streams in real time to YouTube, uses AI to recognise people, vehicles and licence plates, runs without mains power for nearly two days, and can be moved from your car to your cabin in minutes. The total cost for the full system stays under €200, and the basic package costs only around €80.
Three Tiers: Choose According to Your Needs
The system can be built at three tiers depending on how far you want to take the project. Each tier builds on the previous one, so you can start with the basic package and expand later.
Basic package (~€80) provides two Full HD cameras that record locally to memory cards and can be viewed remotely through the camera's own app. This is enough for many people: you get a dashcam and a cabin camera for the same money, and everything works straight out of the box.
Mid-tier (~€140) adds a Raspberry Pi mini-computer to the mix, enabling secure remote access via Tailscale and continuous recording to YouTube as a private stream. In practice, you get unlimited cloud storage for free and can view your cameras securely from anywhere in the world — with no monthly fees.
Full setup (~€200 + $50/year) brings in an external SSD for local storage and Frigate NVR with AI-powered detection. With a Frigate+ subscription, you get licence plate recognition — worth its weight in gold for dashcam use. At this tier, you have both cloud storage and a local backup, and AI automatically identifies people, vehicles and licence plates.
Shopping List: Clear Packages
You can put the basic package together with a single trip to Puuilo. For the extensions, you will also need an online retailer.
Basic package (~€80):
Two Emax Smart Home surveillance cameras at €19.90 each. These cameras offer 1080p Full HD video, 10-metre night vision with infrared LEDs, motion detection with automatic recording, two-way audio, and support for up to 128 GB memory cards. Most importantly, the cameras support the RTSP protocol, which enables streaming to external systems.
Two 20,000 mAh power banks at €19.90 each. The Telefonen power bank provides USB-C charging at 18 W and sufficient capacity for approximately 1.5–2 days of operation per camera.
A mobile router — the ZTE U10, for example — costs around €35 new on sale. This creates a dedicated network for the cameras and provides 4G connectivity for streaming.
Mid-tier additions (~€60):
A Raspberry Pi 3 Model B+ is the best choice in terms of price-to-performance ratio. The price ranges between €40–50. For the Pi, you will also need a 32 GB microSD card for the operating system (around €8) and a suitable power supply or USB cable (around €5).
At this tier, the Pi handles YouTube streaming and the Tailscale connection. No additional storage is needed because everything is saved to YouTube's cloud.
Full setup additions (~€60 + $50/year):
An external USB SSD is essential for local storage. 1080p video consumes approximately 1–2 GB per hour, meaning a single day easily accumulates 24–48 GB. A 256 GB SSD costs around €25–35 and handles continuous writing far better than a microSD card.
A Frigate+ subscription costs $50 per year and provides access to enhanced AI models, including licence plate recognition. Without the subscription, Frigate recognises people, cars and animals, but reading licence plates requires the paid version.
The Secret to Portability: Magnetic Mounting
The true strength of this system is its portability. By gluing a strong neodymium magnet to the bottom of the camera, you get a mount that holds the camera in place even while driving but detaches easily.
In practice, this works as follows: attach a small metal plate — a large washer, for instance — to your car's dashboard or windscreen mount using double-sided adhesive tape. The camera snaps into place magnetically in seconds. The same trick works at the cabin: screw a metal plate to a wall or ceiling wherever you like, and the camera attaches without tools.
This solution means the same camera system serves as a dashcam during everyday driving, a cabin surveillance camera at weekends, and if needed, a temporary security camera at events or construction sites. The entire system fits in a small backpack.
Setting Up the Basic Package
The basic package can be up and running in about half an hour with no technical expertise.
Download the Emax Smart Home app to your phone (available for iOS and Android) and create an account. Add the camera by scanning its QR code and connect it to the mobile router's WiFi network. Name the cameras clearly — for example, "Car camera front" and "Car camera rear."
Critical security step: Go into the camera's settings and activate ONVIF and RTSP. Change the default password to a strong one — at least 12 characters including upper and lower case letters and numbers. Avoid special characters such as !@#$%, as these cause problems in RTSP addresses.
You can now view the cameras remotely via the app from anywhere, and the cameras automatically record to memory cards when they detect motion. This is sufficient for many users.
Building the Mid-Tier: Pi, Tailscale and YouTube
If you want secure remote access and cloud storage, the next step is setting up the Raspberry Pi.
Raspberry Pi installation begins with the Raspberry Pi Imager application, which you download from raspberrypi.com/software. Select Raspberry Pi OS Lite (64-bit) as the operating system, since we do not need a graphical interface. In the settings, enable SSH access and enter the mobile router's WiFi credentials so the Pi connects to the network automatically on boot.
Flash the operating system to the microSD card, insert the card into the Pi, and connect the power. After about two minutes, you can connect to the Pi via SSH: ssh [email protected].
Tailscale VPN is the first service to install. It enables secure remote access to the system from anywhere in the world. Tailscale creates an encrypted WireGuard tunnel between your devices without requiring you to open ports on your router or understand anything about network infrastructure. Installation is straightforward: curl -fsSL https://tailscale.com/install.sh | sh followed by sudo tailscale up.
Configuring the YouTube stream first requires YouTube Studio, where you create a new live broadcast. It is important to understand what we are doing here: we are not broadcasting a public livestream — we are using YouTube's private stream as free cloud storage. When you set the visibility to "Private" or "Unlisted," no one else can see the stream. YouTube records everything automatically, and for verified accounts there is effectively no upper limit on stream duration. You get unlimited cloud storage for free, and the recordings remain on your YouTube account for as long as you want.
Copy the Stream Key from YouTube Studio.
On the Pi, install FFmpeg with sudo apt install ffmpeg -y. Then create a streaming script that pulls the RTSP stream from the camera and sends it to YouTube. The script should be set to start automatically as a systemd service, so streaming continues even after the Pi reboots.
At the mid-tier, you now have secure remote access via Tailscale and unlimited cloud storage on YouTube. This is sufficient for many users who do not need AI detection.
Building the Full Setup: Frigate and AI
If you want licence plate recognition and local storage, the next step is installing Frigate NVR.
Connecting the external SSD to the Pi is the first step. Format the SSD to the ext4 file system and mount it permanently. This provides sufficient storage for Frigate's recordings.
Frigate NVR installation is done through Docker. Frigate provides a web interface where you can see all cameras in real time, a timeline of events, and objects identified by the AI. The free version recognises people, cars, motorcycles, bicycles and animals. With a Frigate+ subscription, you also get licence plate recognition — worth its weight in gold for dashcam use.
Battery Life and Cold Weather Performance
In practical tests, a 20,000 mAh power bank keeps a single camera running for approximately 48–58 hours at room temperature. With the full setup — two cameras, a mobile router and a Raspberry Pi — a two-battery system lasts approximately 17–22 hours.
Sub-zero temperatures significantly affect lithium battery capacity. In tests at -11°C, capacity dropped by approximately 22 per cent, consistent with theoretical values. In practice, this means a theoretical 48-hour runtime shortens to roughly 37 hours in severe cold. Insulating the batteries with bubble wrap, for example, can extend runtime considerably.
Security and Data Sovereignty
The problem with commercial cloud services is that your data ends up on someone else's server. You do not know who has access to it, how long it is retained, or what is done with it. The service provider can change terms, raise prices, or shut down the service entirely. In the worst case, a third party — whether a hacker, a government authority, or a service provider employee — gains access to your recordings without your permission or even your knowledge.
This is not mere paranoia. Multiple cloud services have suffered data breaches, and many countries require service providers to hand over data to authorities without user consent. When your data is on someone else's server, you no longer own it in any real sense — you are merely a tenant at the doorstep of your own recordings.
With your own system, you decide where the data is stored and who has access to it. YouTube streaming with private visibility functions as free cloud storage in practice: streams are automatically saved to your account, and for verified YouTube accounts there is no upper limit on storage. Only you can access the recordings with your own credentials. Frigate stores local copies on the Pi's storage, so you always have a physical copy. Remote access through the Tailscale VPN is end-to-end encrypted, and you do not need to open any ports to the internet.
Tailscale vs. port forwarding is a critical choice. Port forwarding means you open a port on your router directly to the internet, allowing anyone to attempt a connection to your camera. The RTSP protocol is unencrypted, meaning your video stream travels across the network in plain text. Botnets continuously scan for open ports and find vulnerable cameras within minutes. Your camera could end up in a botnet used for denial-of-service attacks, or your stream could leak to public websites that aggregate unprotected camera feeds from around the world.
Tailscale solves this problem elegantly. It creates an encrypted WireGuard tunnel between your devices without requiring you to open a single port. Traffic travels through the encrypted VPN, so no outsider can see or intercept it. At the same time, you can access your cameras from anywhere in the world as if you were on the same local network. Tailscale's free tier supports up to one hundred devices, so there is no cost involved.
Data sovereignty is a matter of principle. When you build your own system, you are not dependent on anyone else's decisions. No one can shut down your account, delete your recordings, or change the terms in the middle of everything. You decide what is recorded, for how long, and who gets to see it. This is digital-age ownership in its purest form.
Other Use Cases
Although this article focused on dashcam use, the same system adapts to numerous other purposes.
For cabin surveillance, cameras can be left in place all summer with a solar panel. For event documentation, the portable system provides evidence in any situation. For construction site monitoring, cameras can be moved from location to location as needed without an electrician. For wildlife observation, the system works as a trail camera that streams discoveries to your phone in real time.
Summary: What You Get for Your Money
The basic package at around €80 provides two Full HD cameras with local storage and remote viewing via an app. Battery life covers 1.5–2 days, and with magnetic mounting the cameras move from place to place in seconds.
The mid-tier at around €140 adds a Raspberry Pi that enables secure Tailscale VPN remote access and continuous YouTube cloud recording. You get unlimited cloud storage for free with no monthly fees.
The full setup at around €200 plus $50 per year brings in an external SSD for local storage and Frigate NVR with AI detection. Licence plate recognition, a web interface, and both cloud and local storage make this a professional-grade system.
An equivalent commercial solution would cost €400–800, require monthly fees, and offer less flexibility. Your own system is modular: you can start with the basic package and expand later as your needs grow.
Technology that was previously available only to authorities and corporations is now within everyone's reach. The question is: will you use it to document your own safety and rights?
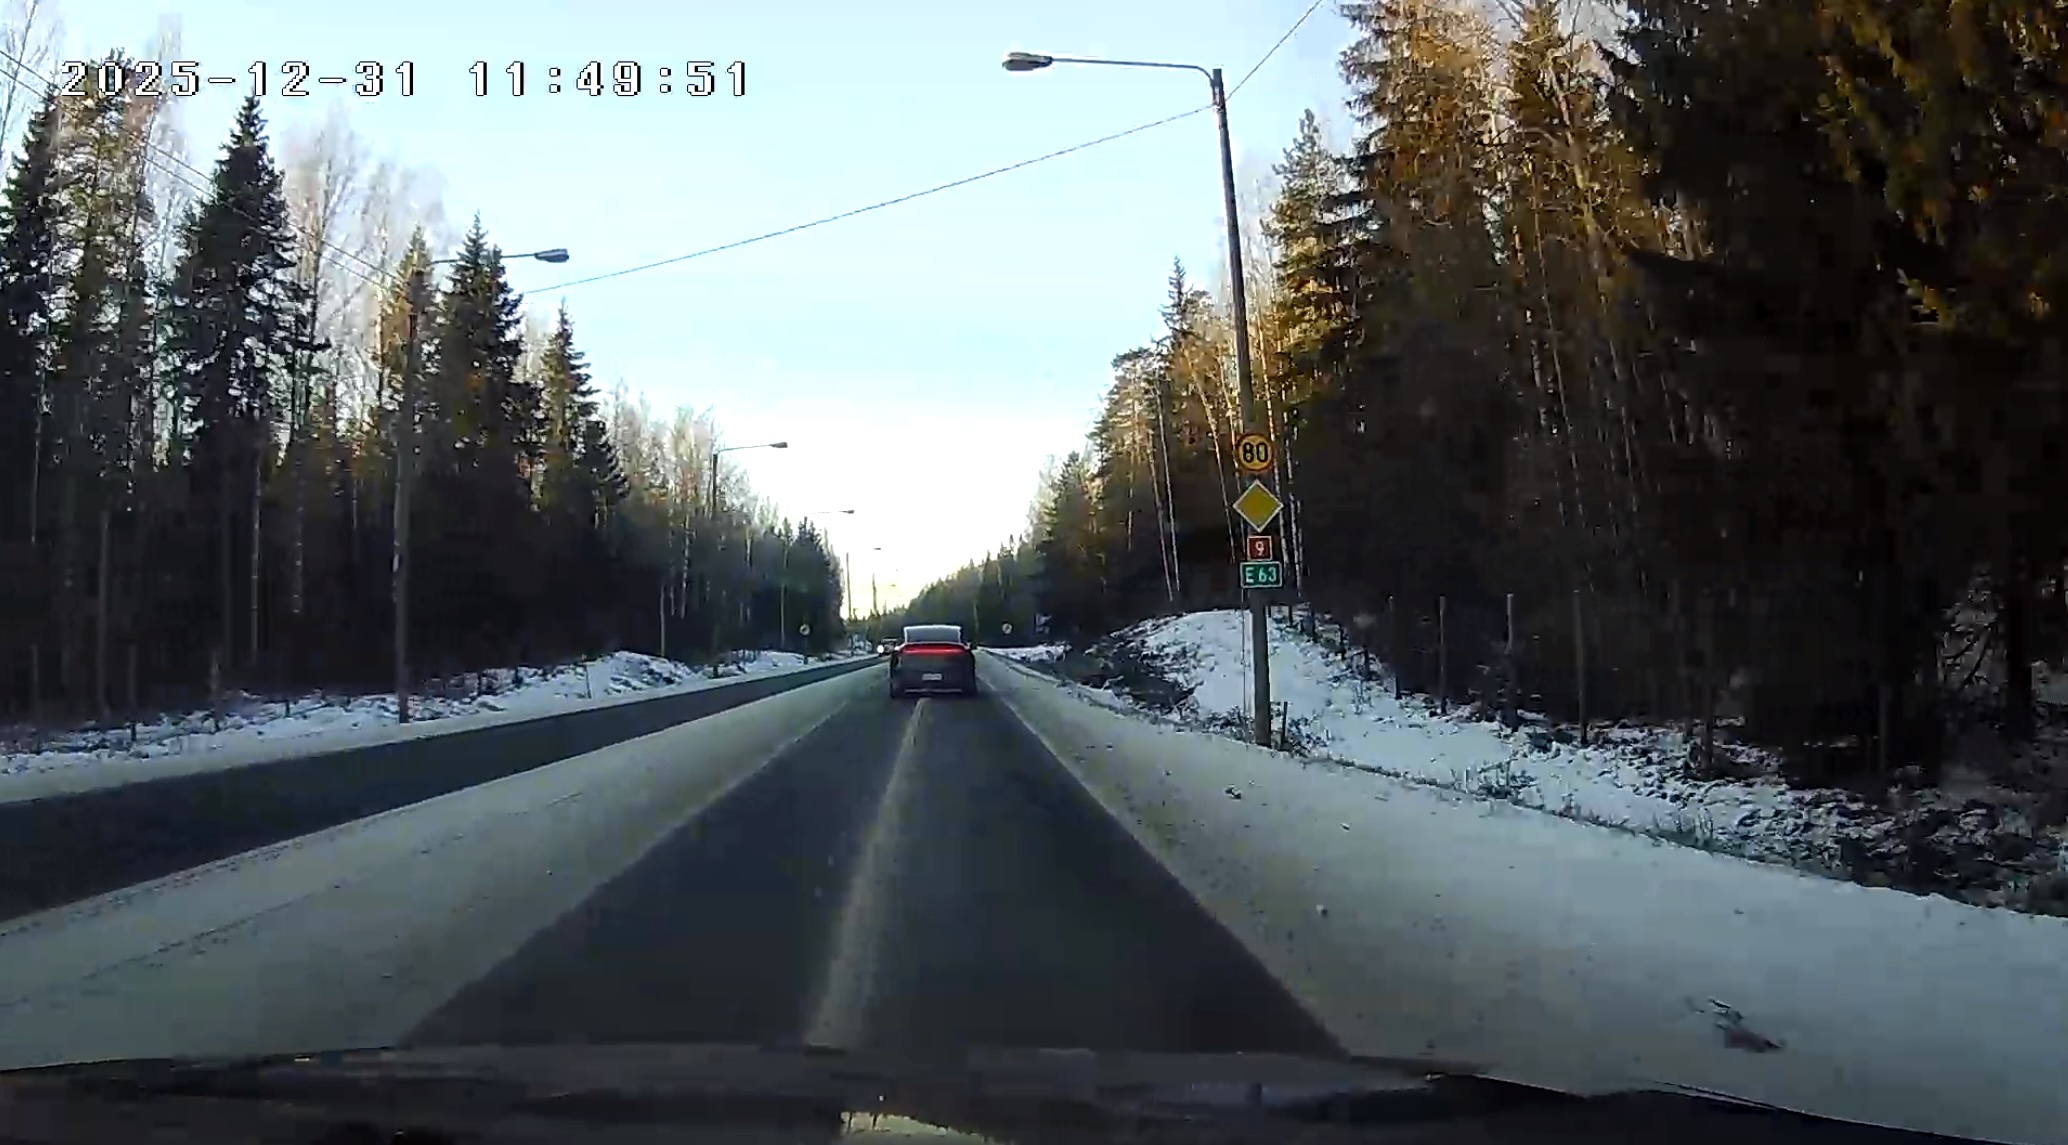
Sample image: This is the quality that is recorded to the stream — and saved locally to the memory card in even higher quality.
In Closing: The Two-Way Nature of Surveillance
We live in an age where surveillance is everywhere. Shop cameras track our purchasing behaviour, traffic monitoring registers our movements, smartphones collect location data, and social media analyses our every click. We have grown accustomed to being the subjects of surveillance, but we rarely stop to consider that surveillance can also work in the other direction.
Citizens have the right to document their own lives. This is not merely a technical possibility — it is a fundamental right to record the truth. When you have your own independent recording system, you also have evidence. In a traffic accident, a dashcam recording can prove who was at fault. In a cabin break-in, camera footage can lead to the perpetrator being caught. But this is also about something deeper.
Truth is an absolute value. It does not change depending on who is looking at it or whose interests it serves. A camera recording is an objective witness that does not lie, does not forget, and does not alter its story after the fact. In an age when narratives are manipulated and truths are called into question, a concrete recording is an anchor to reality.
The Bible teaches: "And ye shall know the truth, and the truth shall make you free" (John 8:32, KJV). This freedom is not only spiritual — it extends into our everyday lives as well. When we document reality as it is, we are not dependent on others' accounts or recollections. We have our own testimony.
Technology in itself is a neutral tool. The same cameras and algorithms can be used for control or for freedom, for falsehood or for truth. What matters is whose hands the tools are in and for what purpose they are used. When you build your own system, you take possession of a tool that was previously the privilege of the few. You are no longer merely a subject of surveillance — you are also a recorder of truth.
This is the two-way nature of surveillance: the same technology that enables mass surveillance also enables the citizen's own documentation. The panopticon works in both directions, and when you choose to build your own system, own your data, and decide its use yourself, you make a choice in favour of truth.
Sources and Further Reading
Frigate NVR documentation: docs.frigate.video
Tailscale VPN documentation: tailscale.com/kb
Raspberry Pi documentation: raspberrypi.com/documentation
FFmpeg documentation: ffmpeg.org/documentation